News Crew: Agamagraph Project

Hello, Grade 7s and Grade 7 families!


Please see below for an update from our News Crew about a recent assignment from Career Education:


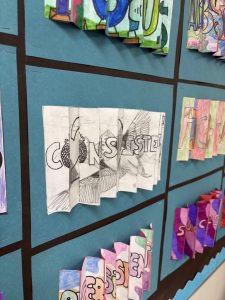
” For this project, you have chosen one word to describe your outlook for this year…  a trait that you are working hard to develop and master.   – Ms. Ramen”
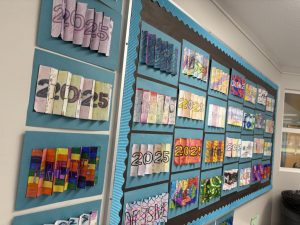
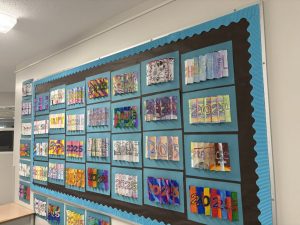
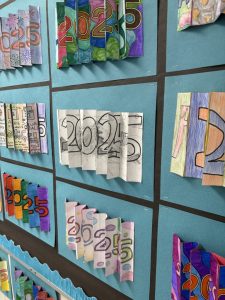
Thank you for letting us borrow this quote Ms. Ramen! The agamograph project, as you saw up there ↑, is one word, that would describe your goals for this year (i.e. courageous – Trying things that scare you. As if you succeed with the things that scare you, it may make you a better person.) To make the agamograph, we needed to design and create a creative art background for our word, and color the number “2025”in, (even if all our minds are still in 2024). After cutting it out into 6 pieces we were ready to put it together to make the agamogragh.
The effect of the agamograph makes it so it has 2 sides. If you’re facing the agamograph on the right side you may see 2025, Same on the left, except you may see the other word. This effect happens when the back of the paper sticks up making it like a mountain effect. 6 of the pieces are put facing one way in this case the 2025 pieces would be facing its right side, and the word/goal is facing its left side this creates the effect that makes agamographs so cool.
This word is almost like your new year resolution after writing a paragraph on how we were going to accomplish this definition for ourselves, we are now ready to put our goal into action.”
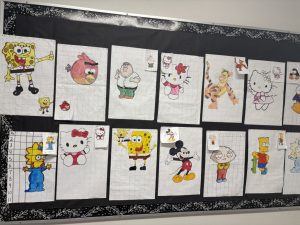
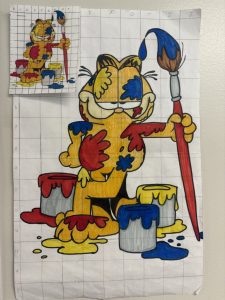
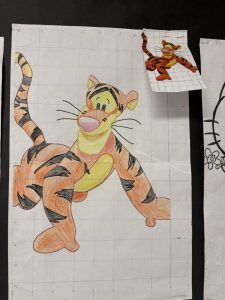
See the agamographs in action in the photos below. Thanks, News Crew!

News Crew: Cartoon Math Project

Hey, Grade 7s!

Please read this update from our News Crew about your amazing to-scale cartoon Math projects:

This project was a great start to our unit on Cartesian plains. This required the skills of both art and math as we had to measure the lines to create a grid. With a small picture of the cartoon character, we were trying to recreate on a bigger paper. We were blowing up the pictures from 1 Cm to 3 Cm, so the picture on the bigger grid was significantly bigger.  

The first thing we did was choose our character… it was a little outdated, and [we wish there was an option for] Bluey. The usual characters were an option, like SpongeBob, Hello Kitty, and a weird starfish. But there were also things that you wouldn’t expect, like Homer Simpson.  

We start with a blank piece of paper, not lined, not turned into a grid, just blank. The first thing you must do straight away is get a ruler. (A note to families: if your kid doesn’t have a ruler, please get them one, since if they don’t have one they will be fighting everyone else to get one of Ms. Ramen’s spare rulers). Afterwards, we worked on creating grids on both the big blank paper and the tiny printed picture of the cartoon character we chose to do. We had to copy the grid of the tiny cartoon picture to the big paper. After carefully drawing the character, we were now ready to use more of our  skills by colouring. After that’s all done we have finally finished our project and we can now sit back and enjoy the view of all the huge cartoon characters outside of the computer lab.”

Thanks, News Crew!


Skulls Project: Student Voice

Hello, Grade 7 students and families! I’d like to formally welcome our first post from Div. 2’s ‘News Crew’. They will be periodically updating our class blog with information about projects, assignments, etc.

Below an excerpt from their overview of the clay skulls activity our class completed for Socials:

“This project was a great overview of what we learned in Socials. Creating skulls that represented our earlier ancestors. These skulls ranged from early Ardipithecus to our generation Homo sapiens. We started by using clay to put together our skulls. We needed to round out the clay and then use tools like chopsticks to help make the eyes. Ms. Jesse Lyn (our artist in residence) taught us about clay making and how ceramic is made.

To make the ceramic skulls we first need to learn how it happens. The first material is clay which can be found at the bottom of streams and riverbanks. Then we need to model the clay like we did with our skulls. After the clay sculptures or in this case skulls, gets taken to a giant oven [kiln] that warms up between 2124’f and 2264’f (1162-1260’c). After it is done being fired it is given back to us to glaze.

After about 2 days or so Ms. Jesse Lyn brought back out hominid pottery. As we were going to start the 2nd phase, glazing. (Please note: glazing is a pottery term of when you put color into your pottery, but it could also be the icing on a cake. The first phase is what we’re going for!).

You grab a brush of a color you think fits your skull and then you paint. There is red paint, a couple of different grays, [beige and white], and a darker color. “Why would you paint your skull red?” you might ask. Well, the reason is quite simple. When the clay gets fired the colors change drastically so when you get your skull back the red will now be a pinkish-gray. Each group took about 10 minutes, so with 5 groups the glazing took roughly 50 minutes. And so, we had to wait 2 more days. There would be a chance that you wouldn’t recognize your pottery after it was glazed, but that’s why the teachers thought ahead (like they always do from years of experience) and made us engrave our initials into the back of the skeleton’s skulls.

So, we wrapped out skeletons into some wrapping paper and brought it home. It should now be at your house and you’re staring at it while you’re reading this. Or, your kid might have lost it.”

Thanks so much, News Crew!

-Ms. Ward