Snow Families

We spent the first two weeks’ Art periods working on our Snow Families.  We began by painting the blue ‘sky’ backgrounds onto watercolour paper.  We then cut or ripped up white tissue paper and glued it to the bottom portion of the paper, making the snow base.  This was then drizzled with liquid glue and sprinkled with white crystal glitter.

Students then added the snow bodies using white paint and different sized round sponges – making a snow-figure for each person in their ‘immediate’ family (mum, dad, brother, sister).

The next week, when these were all nicely dried, we added all the extra details.  I made a name banner for each family and the students decorated the snow people with hats, scarves, beads/sequins, etc.  They drew on faces and stick arms with Sharpies.

I think that they look quite amazing.  They are displayed on the bulletin board outside of our classroom.  Check them out, in person if you get a chance, or below …

IMG_4662

IMG_4663

IMG_4665

IMG_4667


IMG_4671IMG_4668

IMG_4669

IMG_4671

IMG_4672

IMG_4673

IMG_4675

IMG_4676

IMG_4677

IMG_4678

IMG_4679

IMG_4680

IMG_4681


Clay Snowpeople

We spent several days in December working on the students’ presents to their families.  For many of the students this was their first experience working with clay.

Students began by building the clay into three rings around a wooden doweling form. They learned how to join the clay sections and make it smooth with small bits of water. They pulled out ‘carrot’ noses and then created hats for their people.  Holes were put into the sides of the snow people and the students’ initials were carved onto the bottom of the forms.

These clay forms needed to spend a week drying in the class before they were put into the school’s kiln where they underwent their first ‘firing’.  When they came out of the kiln the students glazed them, and their hats, and then they went back into the kiln for their second (and last) firing.

Students collected twigs from the playground which were used for the snow-people’s arms.  Students made felt scarves by gluing small bits of felt onto a longer piece. They chose three pom poms for the buttons and used a black Sharpie pen to draw on the mouths.  When the pieces were all put together the snow people all looked very festive indeed!

IMG_4629IMG_4630

I hope you all enjoy having these as part of your holiday celebrations for years to come!

The Three Bears … and a Few of their Friends

IMG_4610

We did a directed drawing lesson on ‘bears’ this week.  The next day the students did a much larger version of this bear’s portrait.  The lines were then traced over with China markers.  Students had used these markers to outline their Remembrance Day poppy art.  Today students had the opportunity of working with oil pastels.  They were given guidelines on colour choices available for the different sections.  The background needed to be one of the varieties (shades or tints) of either green or blue. They were also instructed in the ‘smudge-iness’ of working with oil pastels and were supposed to work from the inside to the outside in order to not rub the colours into each other.

IMG_4611

IMG_4612

I think the students should be very proud of their hard work.  Many said that their hands were sore afterwards but they were troupers and I think that they did a great job.

Complementary Colours

IMG_4607

As part of our exploration of the elements of art (colour) students created complementary colour patterns.  We read the book, “Hello, Green Fox”, by Eric Carle, which shows how the colour opposites can trick our eyes.  Students learned which colours are the opposites of each other: red/green; purple/yellow; and blue/orange.  They learned that opposites, when placed next to each other, make each other seem brighter and almost appear to glow.  They also got a chance to get ready for making winter snowflakes through the cutting technique. Check them out on the bulletin board outside our classroom, if you are in the building.

Poppies, poppies, everywhere …

IMG_4585

We have spent the past week getting ready for Remembrance Day.  This has involved stories, poems, and discussions about war, peace, and the reasons that we recognize this important day each year.  Student learned about John McCrae, a Canadian army physician, who wrote the famous poem “In Flanders Fields”.  They made their own poppies out of heart shaped construction paper which they arranged around a copy of the poem.  These are displayed on bulletin boards in the corridor outside of our classroom.

IMG_4591

IMG_4588

We also had a directed drawing lesson on the shape of a poppy.  Students then re-created these poppies onto large cartridge paper which they then outlined with black china marker.  These were then coloured with red painted petals and green centres. After these had dried the students went over the black lines with the china markers again, cut out the poppies, and mounted these onto green construction paper. These are also displayed on the large bulletin board board in the corridor.

IMG_4593

IMG_4597


IMG_4595

The poppies that we made for our wreath are displayed (intact as a wreath) in the centre of this bulletin board.

IMG_4592

Each poppy demonstrates the students’ individual interpretation and creativity. They all look great!

IMG_4594

Directed Drawing Lessons

We have Directed Drawing lessons 3 or 4 times a week. Students follow the direction of my drawings on the whiteboard while creating their own pictures on paper.  They have been taking these lessons quite seriously and are gaining their skills more and more each week.  We have been drawing a variety of domesticated animals.

As a result of these lessons many students are spending their free time (book time or Centres) using my collection of ‘how to’ drawing books to continue to work on their drawing techniques.

IMG_4548

I am happy to see so much enthusiasm for Art!!

Elements of Art – Colour

In the ongoing series of our lessons on the elements of art we have been experimenting with colour.  Students learned about the three ‘primary’ (or first) colours:  red, yellow, and blue.  These are colours that cannot be made by other colours but, when combined, will create other colours.  These colours are called ‘secondary’ colours.  These colours are: green (made from blue and yellow), purple (red and blue combined), and orange (red and yellow put together).  These are ‘secondary’ colours if they are mixed with equal parts of each ‘primary’ colour.  When more of one primary is used than the other, then the resulting colour is called an ‘intermediate’ colour.

IMG_4560


IMG_4561

Elements of Art Lesson

IMG_4552

Last Thursday we had a discussion on the Elements of Art.  Students learned what an element is (the parts that make up a whole thing).  We then discussed the six things (elements) that make up Art – colour, form, shape, value, line, and texture.

On Friday, students explored these elements through the media of wax crayons and leaves by experimenting with rubbing techniques.  They outlined some leaves to show ‘line’ and ‘shape’.  They used a variety of ‘colours’.  By putting more or less pressure on the wax crayons they were able to show ‘value’ (lightness and darkness). The feathery look of the rubbings inferred ‘texture’.  The only element that was not able to be demonstrated was ‘form’ as the leaf rubbings cannot be picked up off of the paper.

The students’ work is on the bulletin board in the hallway outside of our classroom.

Here are some portions of the rubbings:

IMG_4553IMG_4554IMG_4555IMG_4556IMG_4557

Fine Arts Evening – May 27th

In preparation for this Fine Arts evening the students worked with Mr. Olson during their weekly Music classes as well as extra practice sessions with Division 4.

In the classroom we spent a few weeks learning about three different famous Impressionists artists – Claude Monet, Paul Cezanne, and Vincent Van Gogh.  We read a few picture books based on the different artists and their lives.  As well, I read to the students some biographical information on each the artists.  The grade two students remembered Van Gogh from work that we produced last year (‘A Starry Night’ and ‘Sunflowers’).

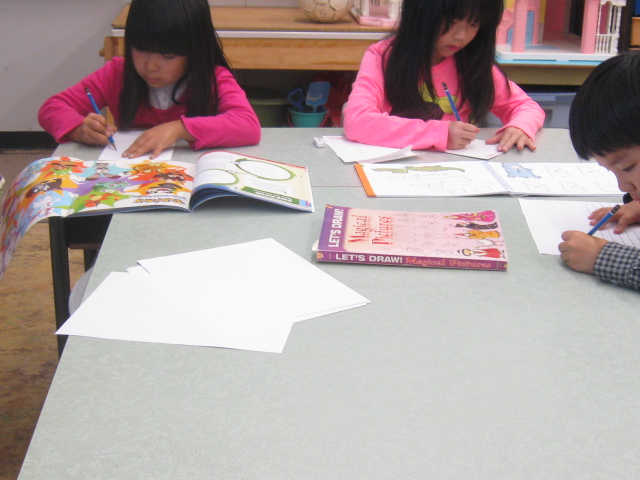
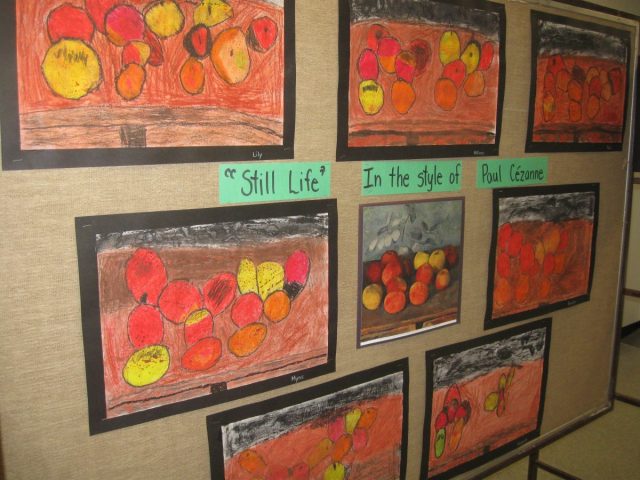
Each of the art pieces began as a ‘directed drawing’ lesson with me modelling on the white board and the students working with pencil and paper.  We used prints of the artists’ work as reference points.  Students worked with oil pastels for the bulk of their finished product.  For the Monet and Cezanne pieces they added a wash of paint on top of the oil pastel.  The Van Gogh pieces were strictly done with oil pastel.

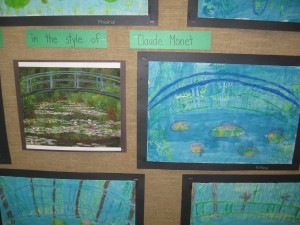
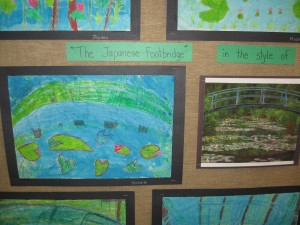
Our first art piece was “The Japanese Footbridge”, by Claude Monet.  Students enjoyed learning about the effect of light on art as we looked at a wide variety of the Monet pieces which only varied by the time of the day when they were painted.  They also liked the water lilies.

IMG_4420

IMG_4421

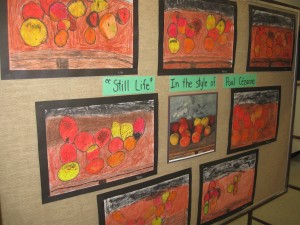
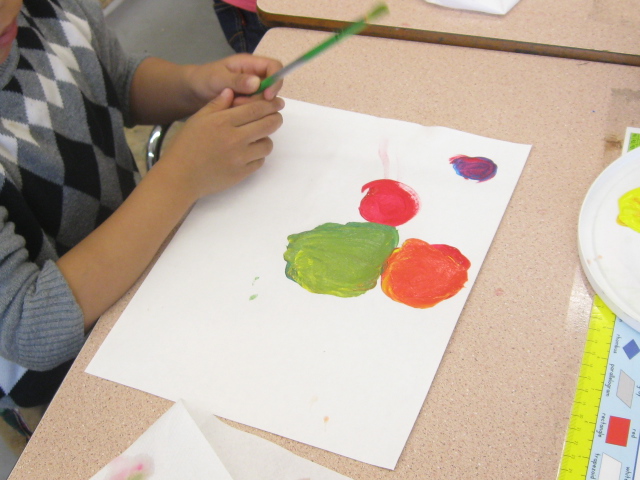
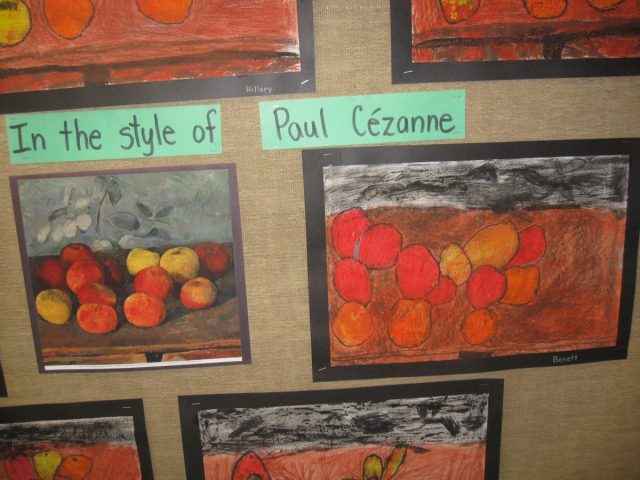
Our next artist was Paul Cezanne.  We looked at a variety of his still life pictures.  Students learned about perspective and shading, as well as the variety of colours in the different pieces of fruit.

IMG_4416

IMG_4419


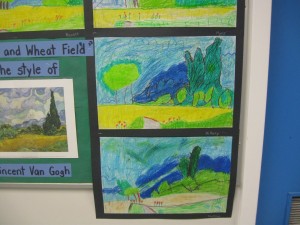
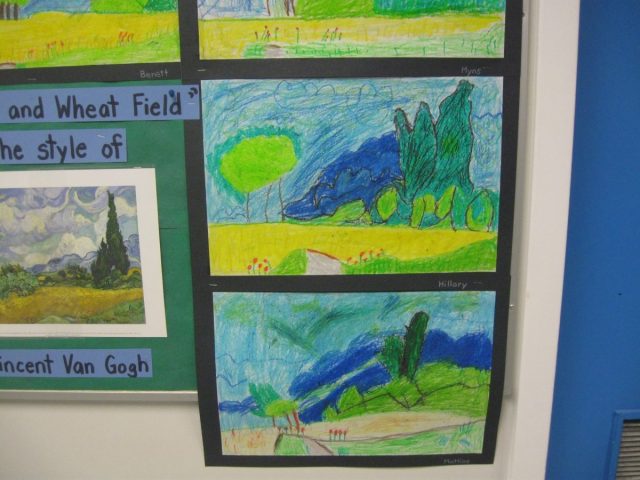
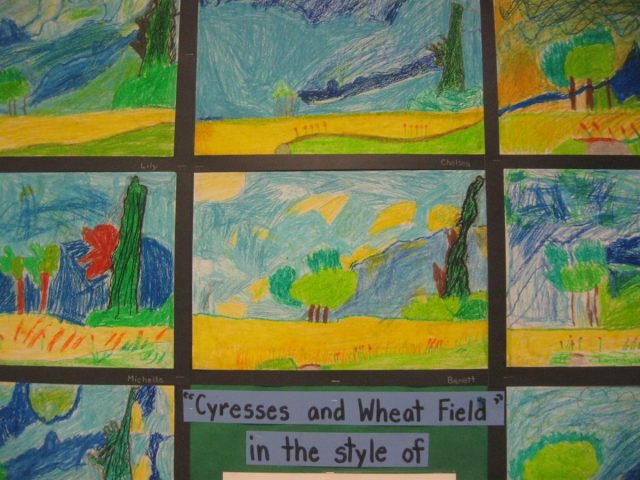
The last artist we looked at was Vincent Van Gogh.   For this picture we re-created “Cypresses and Wheat Field”.  The students worked on doing the horizontal lines of the landscape, the variety of greens and yellows for the vegetation, and the swirls of colours that form the clouds and sky for which Van Gogh is well-known.  [ Yes, I know that ‘cypresses’ is spelt incorrectly on the title – oops 🙂 ]

IMG_4425

IMG_4426