STEM Challenge: Da Vinci & Parachutes

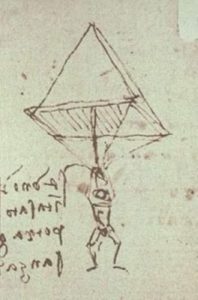
After our very successful catapult STEM challenge (pictures/video to come), our class will be exploring the genius of Leonardo Da Vinci and his amazing flying machines! We will first be examining his blueprint/design for a parachute, and using his journals as inspiration to design our own parachutes!

When we design our parachutes, students may bring up to 2 OPTIONAL MATERIALS from home (ex: paper towel roll, fabric). We have just begun blueprinting our designs, but stay tuned for our results!

Our Final Spooky Science!

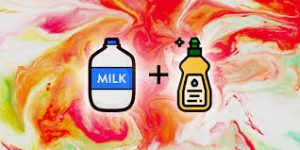
It has been a busy, educational, messy, and fun month of ‘spooky Science’! Our final experiment involved mixing milk, food colouring, and then adding a drop of dish soap. We noticed the food colouring ‘spread out’ and ‘was repelled by’ the soap, and it made interesting tie-dye patterns on top of the milk!

If you want to try this at home (with parent/guardian permission), you will need:

-a small bowl or plate

-milk (whole milk works best)

-food colouring

-dish soap

  1. Carefully pour some milk into the bowl. You want layer that is a few millimeters thick.
  2. Add your food colouring, carefully ‘dropping’ it on top of the milk. Try using different colours.
  3. Do NOT mix the milk and food colouring!
  4. Then, dip a q-tip into the dish soap.
  5. Touch the q-tip to the surface of the milk/food colouring mixture.
  6. Watch what happens next!

Check out this Scientist who did a LARGE version of this experiment in a pool!

Potions Class: Chemistry in Action

Potions Class

Happy Halloween to those who celebrate it! Today, we had a chance to explore chemistry via our “Potions Class”. Our class had to determine what each of the ingredients in our ‘potions’ were based on how they reacted when mixed together. Feel free to click the link above to see the result of mixing “Witch Tears” (water), “Colorful Potions” (food colouring), “Dissolved Eyeballs” (oil), and “Ground Up Bones” (Alka-Seltzer tablets) together to make a bubbling cauldron!

Happy a safe and enjoyable weekend!

Sketching like a Scientist: Our Observation Journals

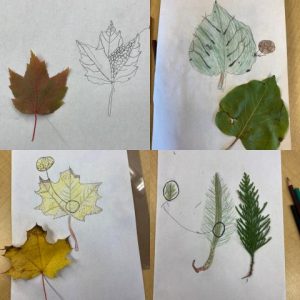
What does it mean to ‘sketch like a scientist’? We learned that sometimes, scientists keep observation journals with detailed illustrations of what they observe. We focused on drawing what we saw in front of us, not the picture in our heads.

I am so amazed by how detailed our illustrations turned out! We have some talented scientists in our room!

Pumpkin ‘Chunkin’: Galileo’s Theory

After our unexpected results, we decided to try our experiment again! We learned that Galileo once tested his theory that gravity will pull all objects, regardless of their mass, to the ground at the same speed. We wanted to see if we would get the same result when using 2 different sizes/weights of pumpkins.

This time, we dropped them at the same time in order to clearly see which fell first, or if they fell at the same speed. Watch our results below by clicking the link below!

Pumpkin Chunkin Results

So interesting! We discovered our pumpkins fell as the same speed this time. I love when Science surprises us!

Pumpkin ‘Chunkin’: Exploring Gravity & Mass

We love when Science surprises us! Our class and Ms. Ramen’s class made predictions about which fruits/vegetables would fall the quickest when dropped from a height. Would the heavier fruits/vegetables fall faster?

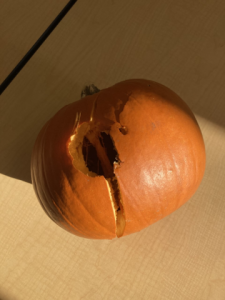
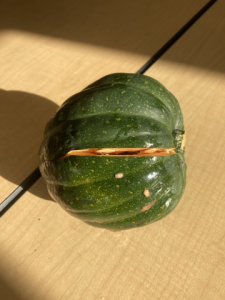
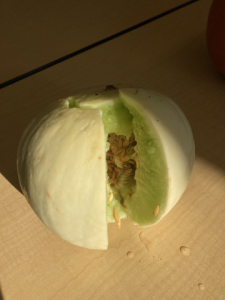
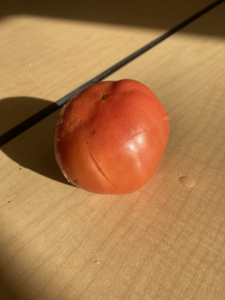
We also predicted which fruits/vegetables would have the most dramatic change when they hit the ground! Would they splatter? Would they crack in half? Would nothing happen? Our results are below!


Our results were that the lighter objects fell faster, but we will be replicating this experiment to reduce variables (human error, etc.) to see if we get the same results as Galileo. Stay tuned!

Float or Sink: Science Challenge

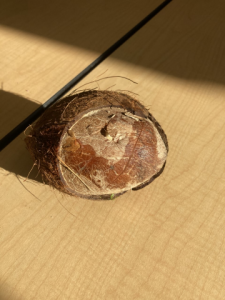
In class today, we explored whether different fruits and vegetables would FLOAT or SINK when dropped into a tub of water. Together we tested: a pumpkin, a mini-watermelon, a honeydew melon, a coconut, and a tomato.

We learned about water displacement and buoyancy. Check out this video to see what another scientist’s results were!

A List of the Most Deadly and Dangerous Animals

Hi, scientists!

What animal scares you the most? Is it a hairy tarantula? A toothy shark? A slithering snake? Often, the animals we are the most afraid of are NOT the ones that are the most dangerous to us!

As part of our biology exploration of the weirdest, creepiest, and most monstrous animals, our class looked at a list of the most deadly animals on Earth. According to a study in 2015, these are the top-ranked most dangerous animals (based on how many human fatalities they cause per year on average)

We learned that many animals that are harmful to humans are dangerous because of their venom or their ability to transmit diseases or parasites. We were also shocked to find out that humans made the list!

Do you see any surprising animals on the list?


Microbiology: Ms. Ward’s Recipe for Agar

Today, our class began collecting ‘samples’ from around the school in order to grow our own mystery microorganisms! We used a cotton swab to carefully collect a sample (from the bottom of our shoe, from our pencil, from the floor, from a doorknob, and other places). Then, we rubbed the cotton swab onto the agar gel in our mini petri-dishes. Ms. Ward made the agar from a few household ingredients. If you want to try this experiment at home, you can use this recipe:
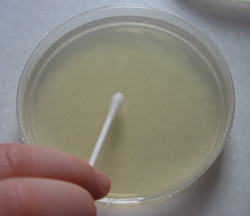
Grow Bacteria On Homemade Agar Plates | Mad About Science

Agar Recipe (for collecting and growing microorganisms) 

  • 5 packets of unflavoured gelatin
  • 10 teaspoons of white sugar
  • 1 packet or 1 cube of chicken or beef bouillon
  • 5 cups of boiling water

Carefully mix together the gelatin, sugar, and bouillon. Add the boiling water and mix well. Put in the fridge to cool for around 10 minutes, until just slightly warm. Then, carefully pour into your petri dishes and refrigerate until needed. Use within 2 days for the best results.

To use: carefully collect a sample using a damp cotton swab. Try to pick somewhere you think will likely have lots of microorganisms! Then, rub the q-tip onto the agar, seal the petri dish, and leave in a warm, dark place for a few days. For safety reasons, do NOT open the petri dish once the microorganisms begin to grow. Observe them, then throw the entire experiment in the garbage.

Note: We talked extensively about ensuring that we do not contaminate our agar. Ms. Ward even discovered that one of her spoons hadn’t been sterilized properly, and it contaminated a few of our petri dishes. If you want accurate results, make sure to sterilize all of your equipment beforehand, and wash your hands!

We will let our microorganisms incubate over the weekend, then check to see our results on Monday. Stay tuned for pictures and updates!