If you are looking for ways to support your child’s learning of language around expectations, visuals are an effective strategy for all learners.
Below is an excerpt from our district’s Learning Support Services blog. Feel free to ask one of us in K-Plus if you would like to know more about visual supports we use in our classroom.
 Visual Supports
 What are visual supports?
Visual supports enhance the communication process for students with language and communication difficulties. Unlike the spoken word, visual information is permanent and can be referred to when memory, anxiety, or distraction get in the way of understanding. Effective visual supports allow students to more independently communicate choices, follow daily schedules, transition from one activity or environment to another, and to understand directions, rules or expectations. Visual supports remain constant and accessible in the student’s environment. This reduces adult dependence, minimizes stress, and reduces inappropriate behaviours exhibited when the student does not understand expectations or cannot effectively communicate.

How do I teach my student to use visual supports?
Use the Three-Stage Explicit Instruction Model (see Explicit Teaching) for teaching visual supports.
Who would benefit from visual supports?
Visual supports benefit all learners, and they are especially beneficial for non-readers, english language learners and students with emotional, attention, or cognitive challenges.
Types of visual supports include:
… more to come!
 Green and Red Choices
What are green choices and red choices?
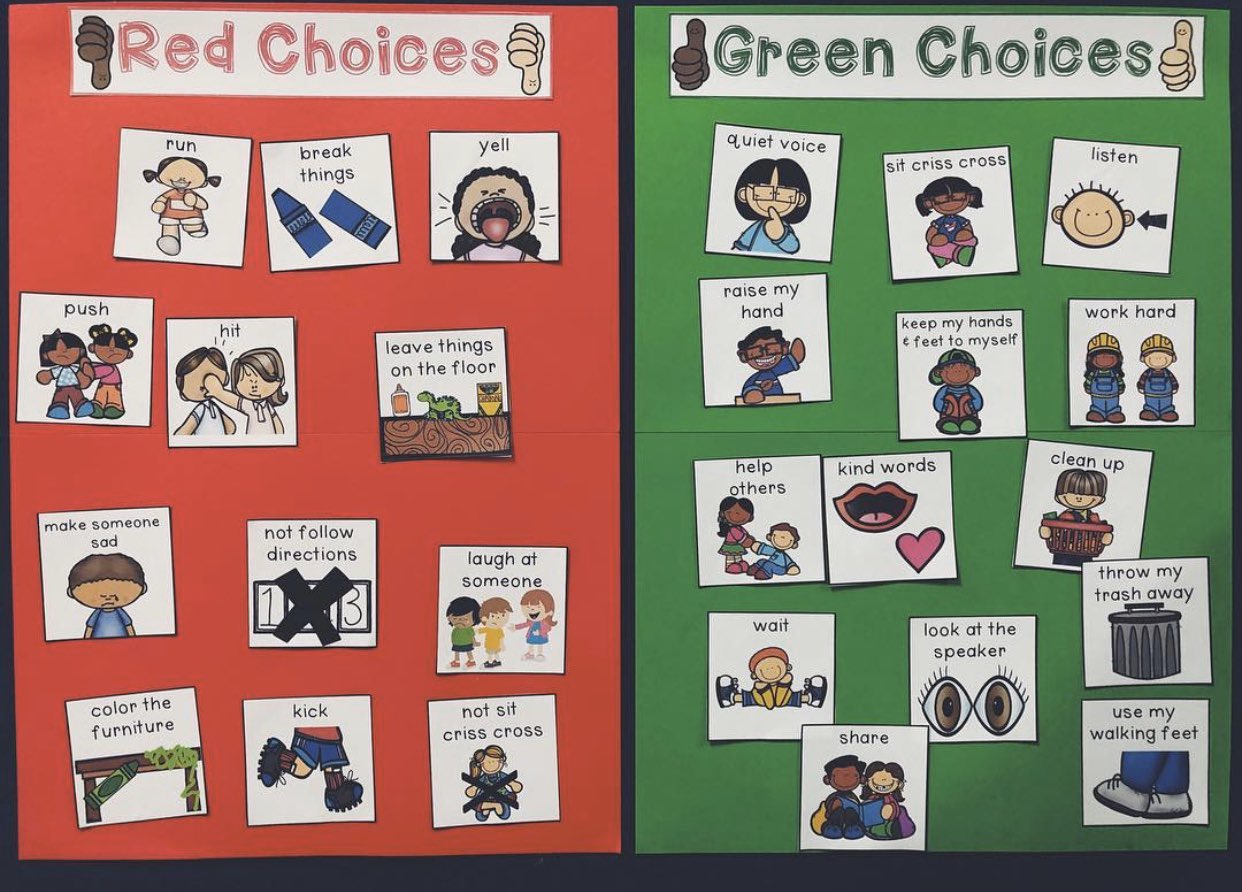
Green choices and red choices is a universal support used for social-emotional behaviour management in classrooms, like Kindergarten Plus, to teach expected and unexpected behaviours through positive language that can also be implemented in all settings (e.g., home, community) through choices and self discipline. Being able to make good choices such as, listening, sharing, using kind words, and having a calm body, allows for students to be happy and confident learners when working alone or with others; while refraining from engaging in red choices such as, yelling, throwing objects, and hurting others, which could negatively effect the student’s and peers’ learning.
Green choices are good behaviours, worded in a positive way. Positive language is the focus of this system because it fosters a loving and safe environment where students are able to learn and grow. When red choices are made, we focus on the choice and quietly and simply redirect the student to change their behaviour and make a green choice instead.
Making green choices can be hard but we will have Choices Charts in our classroom to pair each expected and unexpected behaviour with a visual supports. We will be teaching green and red choices all year long, also through books and activities. Providing students ample opportunities to see and discuss green and red choices allows them to ask questions and see how their choices not only affect themselves but those around them.

Examples of positive, green choice language that can be used at home:
Say…
- Walking feet
- Inside voice
- Hands to yourself
- Let’s work as a team
- Use kind words
- Put it in the trash/recycle can
- Can you share or trade?
- Is that a green choice?
- You look upset. Can I help you?
Instead of…
- No running
- No yelling
- No pushing
- Stop fighting about it
- Stop saying mean things
- Stop throwing it on the ground
- Don’t take the toy
- Why are you doing that?!
- Stop the tantrum
 Fine Motor Practice at Home
Fine motor skills are the ability to use small muscles of the hands, wrists, and fingers to complete tasks including, grasp small objects, colour with crayons, cut with scissors, and write letters.
It is important to remember fine motor development takes time and your child will need frequent opportunities to strengthen their control and hand eye coordination. The most important thing to remember is to make it fun!
Below are some fun fine motor activities to try at home to increase control and hand strength:
- Do a variety of puzzles.
- Tear paper and make a collage.
- Peel and stick stickers and/or tape to paper.
- Build or play with dominos.
- Colour and write with broken crayons, short coloured pencils, and thin markers.
- Offer tracing stencils or trace around objects.
- Paint with various types of brushes and on various surfaces (paper, foil, wax paper)
- Sprinkle salt, flour, or oatmeal onto a cookie sheet. Your child can use a finger to makes lines, shapes, letters, and/or numbers.
- Build with small Legos or small wooden blocks.
- Beading activities (e.g., string beads, cereal using pipe cleaner or yarn.
- Play games or explore with tweezers or small tongs to pick up items such as cotton balls, marshmallows, cereal, pom poms, or small rocks.
- Use hole punches, shape punchers, and/or letter punches.


 Reading at Home
Reading at home can make a HUGE difference in developing your child’s reading and language skills! Just 10 to 15 minutes a day of reading added into their everyday routine can help them link sounds to letters, blend letters, and word parts to read and write words. It is important to make this a fun activity; choose books that match your child’s interests to encourage them to be happy and confident readers.
How to build a reader
- Have your child turn the pages.
- Encourage your child to fill in the rhymes as you read.
- Notice patterns in the text and illustrations.
- Have your child be the “reader” and read the pictures to you.
- Notice and talk about letters and the sounds they make.
- Fill a basket with your child’s favourite books, tablet, and/or magazines.
- Help your child fall in LOVE with books!
How to approach reading at home to foster success
- Before reading, make predictions and ask questions (e.g., “What do you think the story is going to be about?”, “Do you think Spiderman will save the city?”)
- Talk about new words and their meaning.
- Make connections to your child’s life, other books, movies/TV, and/or their interests (e.g., “This reminds me of when we went to the pool”, “Just like you, you like to colour!”)
- Talk, comment, and ask questions about the characters and settings as you read the book (e.g., “How does [the character] feel?”, “[The character] was at school at the beginning of the story, where is she now?”)
- After you read the book, have your child retell you the story in order.
- Have your child “read” the books. They may make up the words that may or may not match the text and use the pictures as a guide.
- Act out the story, make different voices for each character, and/or use props. Have fun!
Make reading an adventure
Read in fun places
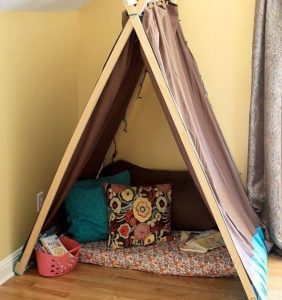
- Make a warm and cozy reading nook in your home with pillows, softs chairs, and/or stuffed animals
- Outside
- Inside
- In the car
- In the bathtub
- In bed
- On the couch
- Under the covers
- Under a tree
- At the library
- In a tent
- At the park

Read fun ways
- With a flashlight
- On the computer
- Act it out
- By singing the words in a whisper
- To a stuffed animal
- To a pet
- Use props/puppets
Read different kinds of books
- ABC
- Counting
- Fiction
- Non-fiction
- Big/small
- Long/short
- Rhyming
- P0etry
- Song
- Fairy tales
Read about different things
- Family/friends
- School
- Holidays
- Sports
- Dance
- Food
- Birthdays
- Forest/polar/zoo/ocean animals
- Pets
- Dinosaurs
- Insects
- Vehicles
- Plants
- Princesses
- Farms
- Science
- Seasons
- Weather
- Various habitats
 Writing at Home
The key to helping your child love drawing and writing is to make learning as fun as possible! Build your child’s confidence by encouraging him/her by remembering the following:
- Writing should be stress free!
- Allow your child to draw and write at their level. Every child starts with scribbling; it is a way for your child to make sense of his/her thoughts in a way that makes sense to them.
- Encourage your child to draw about their writing. Pictures are just as important as words!
- Use a variety of tools such as, pencils, pens, markers, and crayons.
- Let your child know you value what he/she writes. Read it! Hang it up!
- Let your child see YOU writing in your daily life!
Ideas on how to create purposeful reasons to draw and write
- Make a shopping list before going to the store
- Make a card (e.g., birthday, thank you, Valentine’s Day, etc.)
- Make a sign for each person’s door in your house
- Make or buy a journal for your child to write and draw their thoughts, feelings, ideas, and important/daily events
- Make a wish list
- Make lunchbox notes for siblings
 Learning About Letters at Home
In order to increase your child’s exposure to letters, it is important to create as MANY opportunities as possible to explore letters! Hands on experiences will make the most impact and make the learning process fun. There are 26 letters for your child to learn, 52 if you could uppercase and lowercase letters separately. That is a lot of letters, so go slowly and try starting with your child’s name. Chances are the first letter your child learns will be the first letter of his/her name, followed by the rest of the letters of their name and other important words like ‘mom’ and ‘dad’. Name building activities are a great and fun way to learn letters.


 Math at Home
Fun activities to try
- Read counting books.
- Go on a shape hunt inside or outside. Feel and count the sides and/or corners of each shape.
- Sort the laundry by colour or clothing category, then count the number of items in each pile. Which pile has the most/least?